How to Style a Rental-Friendly Gallery Wall Without Nails

Let’s be real: your landlord probably treats your security deposit like a sacred, untouchable relic. I’ve seen it a thousand times—tenants getting hit with "wall damage" fees because they wanted to hang a single framed print of their cat. After watching my brother lose two hundred dollars because he decided a hammer was his best friend, I’ve made it my personal mission to ensure you don't make the same mistake. You want a home that reflects your personality, not a sterile, beige box that looks like a waiting room. You want a gallery wall. But you also want your full deposit back when you move out.
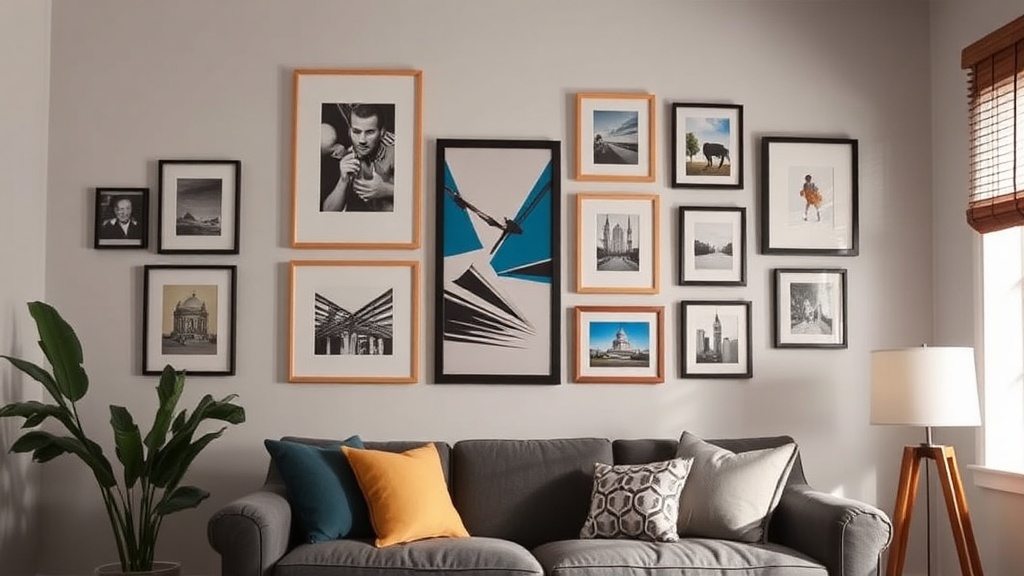
A gallery wall is the ultimate way to add character to a rental. It turns a blank, uninspiring wall into a curated collection of your life. The problem? Traditional hanging methods involve nails, screws, and the very real threat of a "repaired surface" charge on your move-out statement. The good news is that we live in the golden age of adhesive technology. You can have a high-end, designer look without ever touching a drill.
Step 1: Choose Your Adhesive Strategy
Before you even buy a single piece of art, you need to understand the tools of the trade. Not all adhesives are created equal, and using the wrong one can lead to a peeling wall or, worse, a hole in the drywall that your landlord will definitely notice.
Command Strips and Hooks
Command Strips are the gold standard for a reason. They are designed to be removed cleanly without leaving residue or tearing the paint. However, there is a catch: you must follow the weight limits religiously. If a strip says it holds 5 lbs and you hang a 7 lb heavy-framed oil painting, that painting is hitting the floor, and your wall is getting a dent. Use these for lightweight frames, canvases, and even small mirrors.
Poster Putty and Mounting Tape
For things like unframed prints, postcards, or lightweight posters, high-quality mounting putty (often called Blue Tack or similar) is your best friend. It’s inexpensive and completely non-permanent. If you are looking to decorate a smaller area, like a desk or a bookshelf, you might want to look into mastering vertical storage to keep your surfaces clear while using these lighter adhesive methods.
Washi Tape
If you want a more "indie" or bohemian look, Washi tape is a game-changer. It’s a decorative Japanese masking tape that is incredibly easy to peel off. You can use it to "frame" prints directly on the wall. It’s perfect for a minimalist aesthetic where you want to avoid the bulk of heavy frames. This approach fits perfectly if you are aiming for a minimalist aesthetic that feels intentional rather than cluttered.
Step 2: Curate Your Collection
A common mistake people make when building a gallery wall is grabbing random items from a clearance bin without a plan. This results in a "cluttered" look rather than a "curated" one. To avoid this, you need a theme or a cohesive element.
- Color Palette: Choose 2–3 dominant colors. If your art is colorful, keep your frames neutral (black, white, or wood). If your art is monochromatic, you can play with more vibrant frames.
- Texture: A gallery wall doesn't have to be just flat paper. Mix in a small hanging textile, a ceramic plate, or even a lightweight basket. This adds depth and makes the wall feel professional.
- Subject Matter: You can mix vintage botanical prints, modern abstract art, and personal photography. The key is to ensure they share a common "vibe."
If you are someone who enjoys bringing nature indoors, consider incorporating botanical sketches or pressed leaf art. This can even complement your indoor herb garden, creating a cohesive natural theme throughout your kitchen or dining area.
Step 3: The Layout (The "No-Fail" Method)
The biggest mistake I see is people starting to stick things to the wall immediately. Stop. Do not do that. Once that adhesive hits the wall, your layout is permanent. You need to plan your layout on the floor first.
- Clear the Space: Clear a space on your floor that is roughly the same size as the area on your wall you intend to cover.
- The Floor Mock-up: Lay out your art pieces on the floor. Move them around. Rotate them. Try different combinations of large and small pieces.
- The "Anchor" Piece: Every good gallery wall has an anchor—usually a larger, heavier-looking piece (even if it's lightweight) that acts as the center of gravity. Place this first in your layout.
- The Spacing Rule: Aim for 2 to 3 inches of space between each piece. Consistency is what makes it look like a professional installation rather than a random collection of things.
- Photograph the Layout: Once you love the arrangement on the floor, take a photo of it from directly above. This is your blueprint.
Step 4: Execution and Wall Prep
This is where the actual "hanging" happens. If you skip the prep, the adhesive will fail, and you’ll be back to square one (and potentially paying for drywall repair).
1. Clean the Wall: This is non-negotiable. Use a cloth with a bit of rubbing alcohol to wipe the exact spots where the adhesive will go. Dust, oils from your fingers, and general apartment grime will prevent the adhesive from bonding. If the wall is dusty, the strip will fall.
2. Leveling: Even without nails, you need to ensure things are straight. Use a small level or a leveling app on your phone. Since you aren't drilling, you can easily adjust a piece if it’s slightly crooked, but it’s much easier to do it right the first time.
3. The "Press and Wait" Technique: When using Command Strips, don't just stick them on and hang the art. Press the strip to the wall firmly for 30 seconds. Then, hang the frame. Crucially: If the instructions say to wait an hour before hanging the actual weight, wait the hour. Most people are too impatient and end up with art on the floor.
Advanced Tips for a High-End Look
Once you’ve mastered the basic gallery wall, you can start thinking about how to integrate it with the rest of your room's atmosphere. A gallery wall can feel a bit "flat" if it's the only thing happening in the room.
Consider how light interacts with your art. If your gallery wall is in a dining room or a cozy reading nook, you want to ensure it isn't lost in the shadows. I highly recommend reading up on layered lighting to ensure your new art is properly illuminated in the evenings. A small, battery-operated picture light (the kind with adhesive backing) can make a $10 print look like a $200 masterpiece.
Additionally, think about the season. A gallery wall can be dynamic. You can swap out a few pieces to reflect the time of year. For example, in the spring, you might lean into lighter, more floral themes, or perhaps even incorporate elements from a moon garden aesthetic for a more ethereal, nighttime vibe in your living space.
"The goal of interior design isn't to make a room look like a magazine; it's to make it look like you. A gallery wall is your chance to tell your story without leaving a single hole in the drywall."
Final Checklist Before You Start
Before you dive in, make sure you have the following ready to go:
- Rubbing alcohol and a microfiber cloth (for cleaning the wall).
- The correct adhesive (checked against the weight of your frames).
- A level or leveling app.
- A designated "floor space" for your mock-up.
- A camera/phone to document your layout.
You’ve got this. You don't need a toolkit to make a house feel like a home. You just need a little bit of patience, the right adhesive, and a plan that respects your security deposit. Now, go make that wall look incredible.
Steps
- 1
Plan Your Layout on the Floor
- 2
Select Damage-Free Adhesive Strips
- 3
Test the Weight Capacity
- 4
Clean the Wall Surface
- 5
Apply and Press Firmly