The $120 Renter Balcony Setup: No Drills, No Drama, No Deposit Loss

The $120 Renter Balcony Setup: No Drills, No Drama, No Deposit Loss
If your apartment has a balcony and you’re currently using it as Storage Unit 2 (broken chair, one mystery box, emotional support broom), this is your intervention.
You do not need a contractor. You do not need a $900 "outdoor collection." You do not need to lose your deposit because a landlord decided your "tiny upgrade" was structural damage.
You need a plan that respects three things:
- Your lease
- Fire/safety rules
- The fact that future-you wants that deposit back
This is my exact renter-safe balcony setup system.
Step 1: Do the boring legal check before you buy anything
Open your lease and search these words:
balconygrillplanterattachmentalterationsdrainage
Some leases ban hanging anything on balcony railings. Some ban propane tanks. Some ban visible privacy screens. If your building has HOA/condo rules, those can be stricter than city rules.
Also, grill rules are not vibes. Many jurisdictions using International Fire Code language prohibit open-flame cooking devices on combustible balconies or within 10 feet of combustible construction. Translation: your "tiny cute grill" can become a lease violation fast.
If there’s any ambiguity, email management now and ask for written approval for your setup items. Verbal "yeah probably fine" does not protect your deposit.
Step 2: Pick one balcony job (don’t try to do all of them)
Most renters fail because they design for Pinterest photos instead of real life.
Pick your primary job:
- Morning coffee corner
- Herb + salad micro-garden
- Evening decompression zone
- Laundry drying + utility zone
One balcony can do two jobs, but if you try to do five, it becomes a clutter museum.
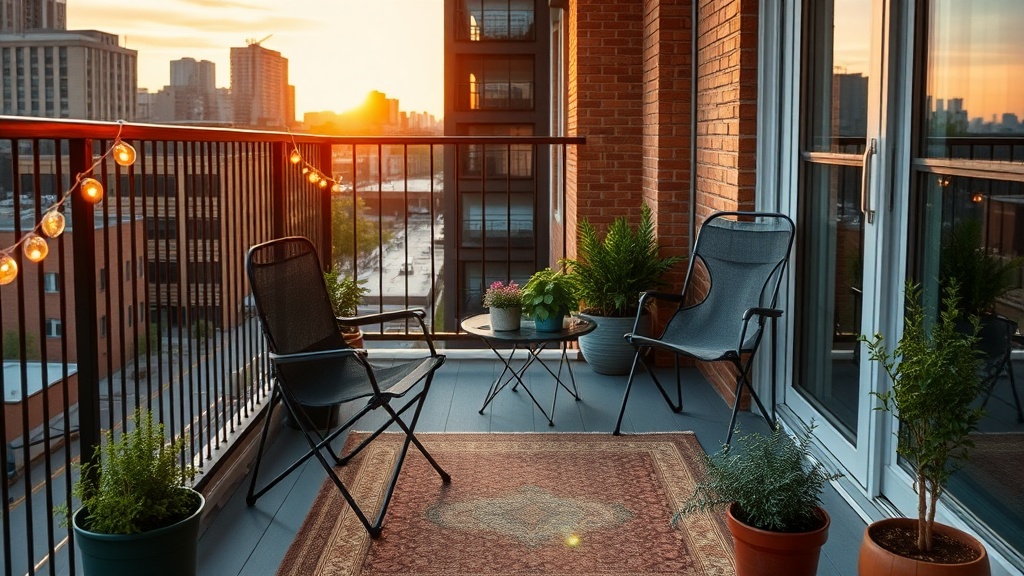
Step 3: Use the no-drill foundation setup
This is the base that works in most rentals:
- Outdoor rug (5x7-ish): Softens concrete, hides ugly floor paint, makes it feel intentional.
- Two lightweight chairs or one folding loveseat: Keep it movable for storms and move-out.
- One narrow table or crate: Surface for coffee, watering can, or plant tools.
- Planters on the floor only (not hanging over railings): Better for safety and less likely to violate rules.
- Warm outdoor string lights rated for exterior use: Use removable outdoor hooks, not screws.
No anchors into brick. No drilling into railings. No "just one little screw" into exterior wall. Exterior penetrations are where deposit fights are born.
Step 4: Plant like a renter, not like a suburban gardener
Container gardening is perfect for balconies, but keep expectations realistic.
If you get 6+ hours of direct sun
Go with:
- Basil
- Thyme
- Rosemary
- Cherry tomatoes (one plant per large pot)
- Marigolds (cheap, hardy, forgiving)
If you get 3 to 5 hours of sun
Go with:
- Mint (in its own pot or it will become your landlord)
- Parsley
- Cilantro (in cooler months)
- Lettuce mixes
- Coleus or impatiens for color
If your balcony is mostly shade
Go with:
- Snake plant (in summer shade, then bring inside before cold snaps)
- Pothos
- Ferns
- Hosta in containers
Use potting mix, not yard dirt. Yard dirt compacts in containers, drains badly, and turns your balcony into a mosquito training camp.
Step 5: Build a water system that won’t start neighbor beef
Downstairs-neighbor rage is usually caused by one thing: uncontrolled drainage.
Do this:
- Put saucers under every pot
- Water slowly in the morning
- Empty standing water after rain
- Keep a small towel handy for overflow
- Never dump plant water off the balcony edge
If your balcony has no drain and puddles form, reduce pot count and use lighter watering cycles. Mold complaints and slip hazards are not the legacy you want.
Step 6: Add privacy without violating your lease
No-drill privacy options that usually pass:
- Freestanding outdoor screen panel
- Tall planters grouped on one side
- Outdoor curtain on tension rod between walls (only if truly pressure-mounted)
- Foldable lattice leaned and secured to heavy planters (not attached to railing)
Avoid zip-tying giant reed rolls to railings unless your lease explicitly allows it. Management often flags that as unauthorized exterior modification.
Step 7: Windproof it before weather embarrasses you
Balcony items become projectiles faster than people expect.
Wind checklist:
- Use heavier planters at the perimeter
- Keep lightweight decor low and contained
- Use locking clips on rugs if your balcony is very exposed
- Bring in cushions and small decor before storms
- Skip tall unstable shelves unless they’re genuinely secure
If you’re in Chicago or another windy city, assume your setup will be stress-tested weekly.
Real budget: $120 starter version
You can absolutely do this without overspending:
- Outdoor rug: $25 to $40
- Two folding chairs (used/new mix): $30 to $50 total
- Small table/crate: $10 to $20
- 3 to 4 planters + saucers: $20 to $35
- Potting mix + starter plants/herbs: $20 to $30
- Hooks/lights (optional): $15 to $25
Total: about $105 to $200 depending on what you thrift.
If money is tight, start with three items only:
- Rug
- Two chairs
- Two herb pots
Then add one piece per paycheck.
Move-out protection checklist (non-negotiable)
Take photos of your balcony before setup, during setup, and after takedown.
When you move out:
- Remove all hooks/adhesives per manufacturer instructions
- Sweep + mop balcony floor
- Wipe railing and door track
- Patch and clean only if your lease requires it
- Photograph final condition in daylight
Future-you should have a timestamped folder if anyone tries creative deposit deductions.
If you haven’t done your full apartment move-in/out documentation system yet, read my first-24-hours checklist here:
https://firstapartment.blog/posts/the-first-24-hours-every-photo-you-need-before-you-unpack-a-single-box
What I’d skip every time
- Fragile decor that can blow off in wind
- Expensive outdoor sets for a tiny rental balcony
- Hanging heavy items over railings
- Anything requiring landlord permission if you know they’ll say no
- Grill purchases before confirming building policy in writing
A renter balcony should lower your stress, not create new admin work.
Start small. Keep it movable. Keep receipts. Keep photos.
That’s how you get a balcony you actually use and a deposit you actually get back.