How to Hang Everything in Your Rental Without Losing Your Deposit

Here's something most landlords won't tell you: the average renter loses $287 of their security deposit to wall damage repairs. That's nearly three hundred dollars gone because you wanted to hang a few photos or mount a shelf. For first apartment dwellers working with tight budgets, that sting hits hard. This guide covers every damage-free mounting method worth knowing—from Command strips to tension rods to removable hooks—so you can personalize your space and keep your money where it belongs: in your pocket.
What Are the Best Damage-Free Mounting Options for Renters?
Not all "damage-free" products live up to the promise. Some leave residue. Others peel paint. And a few fail catastrophically at 2 AM, sending your framed artwork crashing to the floor.
Command strips remain the gold standard for lightweight items—think framed photos, small mirrors, and lightweight wall art. The adhesive technology has improved dramatically over the past decade. Modern strips can hold up to 16 pounds per pair when applied correctly. The key word there is "correctly." Clean the wall with isopropyl alcohol first (not household cleaners—they leave residue). Press the strip firmly for 30 seconds. Wait one hour before hanging anything. Skip these steps and you're asking for trouble.
For heavier items, Velcro industrial-strength strips distribute weight more evenly than single-point hooks. They're ideal for bulletin boards, lightweight shelving, and acoustic panels. The hook-and-loop design also means you can reposition items without removing the base strip—a nice perk when you're fine-tuning gallery wall layouts.
Damage-free hooks come in two varieties: adhesive-based (like Command hooks) and pressure-based (like over-the-door hooks). Adhesive hooks work best on smooth surfaces—painted drywall, tile, glass, metal. Pressure-based options shine on doors and windows where you can't or shouldn't apply adhesives. The weight limits vary dramatically, so check packaging carefully. A "jumbo" hook rated for 7 pounds isn't the place for your 10-pound winter coat.
One often-overlooked option: tension rods. They're not just for shower curtains. A well-placed tension rod creates instant hanging space for lightweight curtains, macramé planters, or even a row of framed photos suspended with clips. The pressure mechanism leaves zero marks and holds surprisingly well when sized correctly for your window or doorway.
How Do You Hang Heavy Items Without Drilling Holes?
Sometimes Command strips won't cut it. You need to mount a TV, hang substantial floating shelves, or secure furniture to walls (a safety must for earthquake-prone Seattle and similar regions).
Furniture anchors designed for renters exist—and they're clever. These systems typically use heavy-duty adhesive pads combined with tension straps or cables. The adhesive attaches to furniture and wall, while the tension mechanism provides holding force. They're rated for furniture up to 200 pounds and remove cleanly when you pull the release tab. IKEA sells a popular version, but specialized brands like QuakeHold offer more strong options for earthquake safety.
For shelving, consider leaning ladder shelves or tension-mounted pole systems. Neither requires wall attachment. Ladder shelves simply lean against the wall—gravity and floor friction do the work. Tension poles (like the ubiquitous IKEA Stolmen or Elvarli systems) extend from floor to ceiling, creating modular storage without a single screw. They're particularly effective in closets, corners, and awkward nooks where traditional shelving won't fit.
What about that TV? TV stands with integrated mounts solve the problem elegantly. These furniture pieces hold your television at viewing height while the base sits securely on the floor. No wall drilling required. For smaller screens, a desktop monitor arm clamped to a sturdy console table achieves a similar floating effect.
If you absolutely must drill—for safety reasons or because no alternative exists—document everything. Take photos before you drill. Keep the original paint color information. When moving out, fill holes with spackle, sand smooth, and touch up with matched paint. The goal isn't to hide the repair from a meticulous inspector (impossible), but to show you made a good-faith effort that meets your lease's "normal wear and tear" threshold.
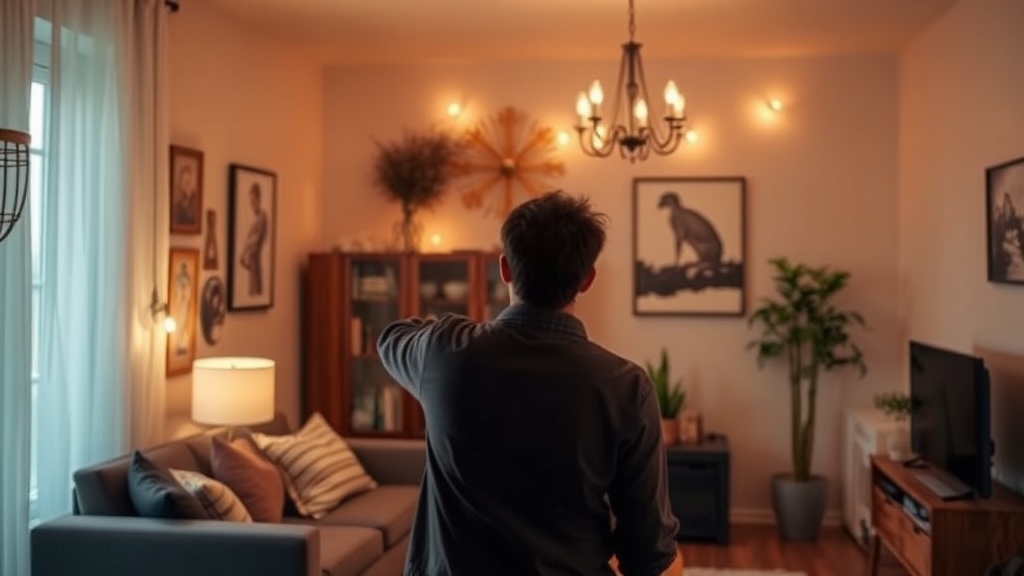
What's the Right Way to Create a Gallery Wall in a Rental?
Gallery walls intimidate renters—and for good reason. Ten nails create ten repair points. But done strategically, a gallery wall needs zero holes.
Start with one large anchor piece mounted using heavy-duty Command strips or a leaning frame holder. This becomes your visual anchor—the piece that grounds the entire arrangement. Everything else radiates from here using lighter mounting methods.
For the surrounding pieces, picture ledges are your best friend. These shallow shelves (usually 3-4 inches deep) sit on the wall with minimal attachment points—often just two small Command strips or adhesive pads. Frames lean against the wall rather than hanging from it. You can layer multiple frames per ledge, creating depth and visual interest while maintaining flexibility. Swap pieces seasonally. Adjust spacing without new holes. The ledge itself becomes a design element.
Another renter-friendly approach: clip systems. Picture hanging wire strung between two adhesive hooks creates a line where clips or clothespins hold photos and prints. The wire bears the weight. The clips grip the paper. Nothing penetrates your drywall. This method works beautifully for rotating displays—travel photos one month, botanical prints the next.
Consider washi tape framing for an intentionally casual look. Decorative Japanese masking tape comes in hundreds of patterns and colors. Create geometric "frames" directly on the wall, stick your prints inside, and peel away cleanly when you're done. It's not sophisticated. It's not permanent. But it's charming, costs pennies, and leaves absolutely no trace.
When mixing frame sizes (which you should—visual variety keeps gallery walls interesting), place heavier pieces lower. Physics works in your favor here—lower centers of gravity mean less strain on mounting hardware. A heavy frame at eye level needs serious holding power. The same frame six inches lower? Much more forgiving.
Planning Your Layout Before Committing
Here's a pro move most renters skip: trace your frames on craft paper. Cut out the shapes. Tape them to the wall with painter's tape. Live with the arrangement for a few days. Adjust until it feels right. Only then do you apply actual mounting hardware to the paper templates, remove the paper, and hang the real frames. This prevents the dreaded "oops, that's not centered" moment that leads to extra holes.
Speaking of centering—gallery walls look best when the visual center (not the geometric center) sits at eye level, roughly 57-60 inches from the floor. That's lower than most people instinctively hang things. Trust the measurement. Your neck will thank you.
How Can You Use Vertical Space Without Damaging Walls?
Small apartments demand vertical thinking. But drilling upward—to mount ceiling storage, hanging planters, or pendant lights—feels even riskier than wall mounting. One mistake and you've damaged something genuinely expensive to fix.
Ceiling-mounted storage doesn't require drilling if you have exposed beams or sturdy ceiling fixtures. S-hooks hang from beams effortlessly. Hanging pot racks (the kind designed for kitchens) suspend from ceiling hooks that screw into electrical boxes where fixtures already exist—no new holes needed. Just remove the existing fixture, install the rack's mounting plate, and replace the fixture. When you move out, swap back to the original.
For planters, macramé hangers with tension-mounted curtain rods create indoor jungles without commitment. Position a rod across a window frame (tension only—no drilling into the window trim). Hang multiple planters at varying heights. The plants get light. You get greenery. The landlord gets pristine walls.
Over-door storage deserves more respect than it receives. Modern over-door organizers aren't the flimsy plastic shoe racks of dorm room fame. Metal grid systems, hanging closet organizers, and even full-length mirrors mount securely over doors without adhesives or screws. The weight rests on the door itself—something your lease almost certainly permits you to use.
The Psychology of Temporary Decorating
Here's the unexpected benefit of damage-free mounting: it forces better decisions. When hanging things requires effort and commitment (drilling, anchoring, repairing), we tend to stick with safe choices. Beige art. Generic prints. "Timeless" pieces that bore us within six months.
Damage-free methods lower the stakes. Try something bold. Rotate pieces seasonally. Experiment with unusual arrangements. If you hate it, change it tomorrow. This flexibility encourages the kind of personal expression that transforms a generic rental into a space that actually feels like yours.
Some of the most interesting apartment interiors I've seen use Command strips to mount vintage textiles as temporary "wallpaper." They clip polaroids to wire grids hung with adhesive hooks. They lean art on picture ledges and swap pieces based on mood, season, or recent flea market finds. The result feels collected rather than decorated—authentic rather than staged.
The bottom line? Your security deposit is yours. Every dollar of it. The temporary nature of renting doesn't mean living with bare walls or generic spaces. It just means getting clever about how you personalize. Start with one wall. Test different methods. Build confidence. Before long, you'll have a space that reflects your taste—and a bank account that reflects your wisdom.
"The best rental decor isn't what you can't take with you—it's what you can change whenever you want."